10 Helpful DIY Dog Feeders You Can Make at Home Today (With Pictures)
Updated on
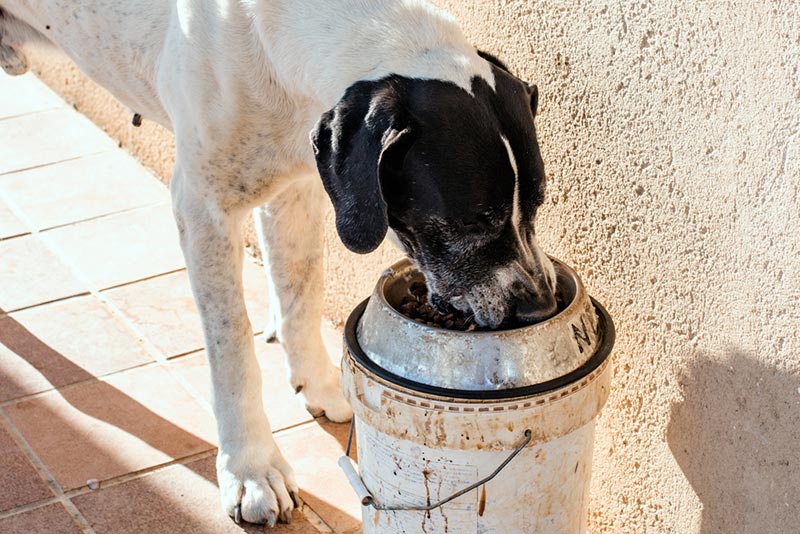
Any dog owner has seen a dog trying to get that last morsel of food from the dog food bowl while the bowl slides around on the floor. You can buy dog feeders from pet stores, but did you know you can make your own for next to nothing? Even if you’re a beginner DIYer, you can find a plan to build your own dog feeder. For those who are more advanced, we have plans for you, too.
In this article, we’ll list ten feeders we feel are excellent choices to build your own dog feeder. Some provide storage, while others strictly give your dog a place to eat and drink without bowls tumbling over or scooting around. No matter your skill set, we have a plan for you.
The Top 10 Helpful DIY Dog Feeders
1. DIY Dog Food Station With Storage by Addicted to DIY
| Materials: | ¾-inch plywood, 1 x 3 pine, 1 ¼-inch brad nails, wood glue, 2 metal dog dishes, ¾-inch square dowel trim, wood filler, paint, stain, hinges, ¾-inch chisel, support lid hinge |
| Tools: | Jigsaw, paint brushes, sander |
| Difficulty Level: | Moderate |
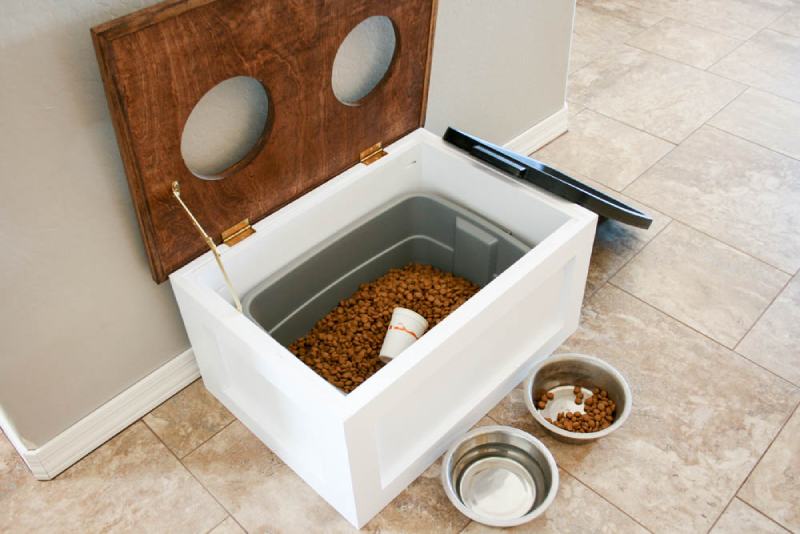
This DIY dog food station with storage will look elegant in your home while serving a terrific purpose. This food station will keep both food and water in place as your dog eats, and its elevation will help senior dogs eat more comfortably. This project will work well for those with large dogs, as the storage compartment will fit a 10-gallon storage tub.
A downfall is you must pay to download the printable plans, but you’ll still be saving money making something like this on your own. Tip: you must download the printable plan to see how much of each material to purchase and use.
2. DIY Dog Bowl Stand by Family Handyman

| Materials: | 1 ¼-inch washer head screws, ¼-inch plywood, 1 X 3, 2 X 2 board, ¾-inch plywood, ⅞-inch iron-on edge banding, dog bowls, wood glue |
| Tools: | Clamps, compass, drill/driver, iron, jigsaw, miter saw, pocket hole clamp, table saw, utility knife |
| Difficulty Level: | Beginner |
This DIY dog bowl stand is an excellent choice for beginners and only takes a few hours to build. Step-by-step instructions are provided with pictures to make the build as easy as possible. This stand is sturdy and will look cute in any home. There is no storage with this build, but it works wonderfully to keep your dog’s food and water in place. It doesn’t take an extraordinary amount of materials and tools, and it should be one of the easier dog feeders to DIY.
3. DIY Dog Feeder Drawer

| Materials: | 1-inch poplar board, wood glue, 2 dog bowls |
| Tools: | Measuring tape, pencil, table saw, jigsaw, or similar, 2 cross braces, 4 legs |
| Difficulty Level: | Beginner to moderate |
Creative thinking is evident in this DIY dog feeder. What’s more, this project requires no nails or screws; it’s all held in place by wood glue. You’ll need to choose a drawer in your kitchen to transform into a dog feeder, which means giving up storage space in your kitchen for kitchen stuff. But hey, your canine pal needs a place for dog food anyway, right?
What’s cool about this plan is that it allows you to make a stand-alone dog feeder or one transformed from a kitchen drawer. The choice is up to you and your skill set.
4. DIY Raised Dog Feeder by Brittany Goldwyn

| Materials: | 2 X 2 pine boards, dog bowls, 2 ½-inch pocket hole screws, wood glue, bar clamps (various sizes), black paint, frog tape, matte finish |
| Tools: | Miter saw, power drill, right-angle attachment, Kreg jig k4, orbital sander, measuring tape, pencil, safety equipment, paint brushes |
| Difficulty Level: | Beginner |
This raised dog feeder includes instructions and a video that shows you how to build it. The trickiest part of the build is assembling the top for the dog bowls. You don’t need many tools or materials to make this raised dog feeder, and it should be relatively inexpensive to make. This project is a good choice for beginner DIYers, and your dog will love the convenience of having a raised feeder.
5. Easy DIY Raised Dog Feeder
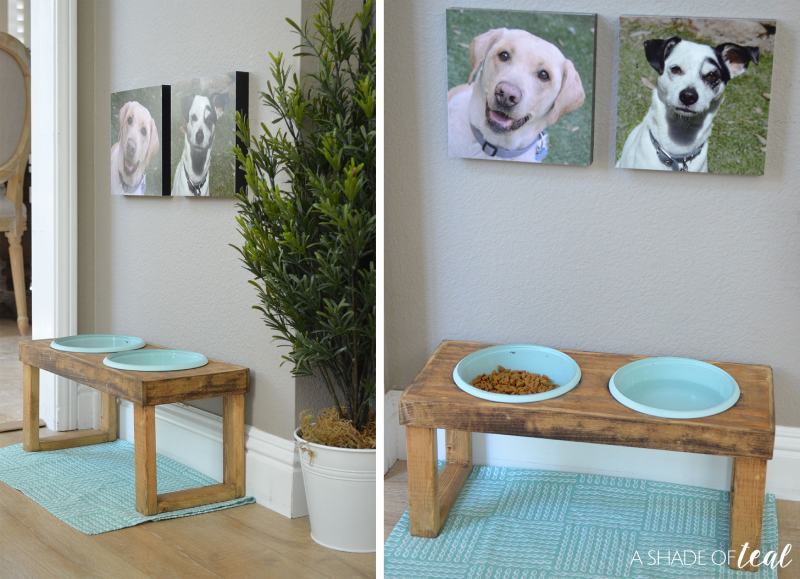
| Materials: | 7 ¼-inch X 18 ½-inch wood/poplar board (top), 1 ½-inch X ¼-inch poplar board cut into (2) 19-inch and (2) 7 ¼-inch pieces (sides), 1 ½-inch X ¾-inch wood strips cut into (4) 5 ¾-inch and (4) 7 ½-inch pieces (legs), wood glue, wood putty, wood stain, 2 dog bowls with a lip edge |
| Tools: | Hammer, nails or nail gun and compressor, drill gun, ½-inch drill bit, skill saw |
| Difficulty Level: | Beginner |
This easy raised dog feeder is designed for a small dog, and the overall height is 8 inches from the floor. Keep this in mind, as you may need to make adjustments if you have a medium to large-sized dog. You can complete this project in 10 steps, and it’s suitable for the beginner DIYer.
The inventor placed this raised dog feeder in her kitchen with pictures of her dogs hanging above the feeder. Can you say adorable? Have fun with this design and make it your own (or your dog’s).
6. Industrial-Style Dog Feeding Station

| Materials: | 10-inch boards (1/2-inches thick), (2) dog bowls, wood stain, finishing wax, (8) 2-inch ¾-inch nipple pipe, (2) 4-inch ¾-inch nipple pipe, (2) 6-inch ¾-inch nipple pipe, (4) ¾-inch floor flanges, (6) ¾-inch 90-degree elbows, (2) ¾-inch tees, (2) ¾-inch caps |
| Tools: | Sander, extra fine steel wool, black spray paint, paint brushes |
| Difficulty Level: | Advanced |
This industrial-style dog feeding station is probably geared more toward the advanced DIYer, but if you can pull it off, this dog feeder is impressive. This project will require pipes and shelves to be mounted to the wall, but it looks elegant, to say the least. You’ll definitely want to ensure you know exactly where you want the feeder in your home before you begin. Be sure to use screws and anchors into the studs in your wall to ensure the feeder is secure.
7. Elevated Dog Feeder by Cuteness

| Materials: | (1) 2 X 4, (4) pipe legs |
| Tools: | Pencil, drill, 1-inch hole cutter drill bit, jigsaw, sandpaper, orbital sander, rag, paint stain, foam brush, water-based polyurethane, 1/8-inch drill bit, Phillips head screwdriver |
| Difficulty Level: | Beginner |
This elevated dog feeder works for one dog or multiple dogs. It’s an excellent project for the beginner DIYer, and you don’t need many tools and materials to make it. The instructions are straightforward, and it shouldn’t take too long to complete. For those wanting a dog feeder with three bowls instead of the standard two, this is a terrific option.
Another perk about this project is it only takes one 2 X 4, so if you make a mistake, you can easily start over. With this in mind, grab a couple of boards just in case.
8. Pedestal Dog Feeder by Room for Tuesday

| Materials: | Pre-fabricated soapstone, stainless-steel dog bowls, ½-inch medium-density fiberboard, primer, paint, ¾-inch pocket screws, silicone |
| Tools: | Tape measure, table saw, miter saw, pocket screw jig, power drill, paint sprayer, nail gun, wood glue |
| Difficulty Level: | Moderate |
This pedestal dog feeder requires soapstone, and you can match the soapstone to your countertop if you desire an elegant look. The instructions come complete with step-by-step guidance, along with pictures. You may not want to take this one on if you’re a beginner DIYer, but if you have an experienced DIYer friend or relative, make an afternoon out of making this pedestal dog feeder; your dogs will love it.
9. Easy DIY Raised Dog Feeder

| Materials: | (2) Terracotta flower pots, large nut, bolt, (2) fender washers, dog bowl |
| Tools: | (2) socket wrenches |
| Difficulty Level: | Beginner |
These easy DIY raised dog food bowls can be done in a cinch without a lot of tools and materials. You only need two flowerpots, a nut, bolt, two fender washers, the dog bowl, and socket wrenches, and you’re good to go.
The sizes of the nut and bolt will depend on the size of flowerpot you choose. You can always paint the terracotta flower pots if the color doesn’t work for you. This DIY is a great idea for water bowl outsides, as this invention will diminish the water bowls tumbling over and emptying out.
10. No-Slip Elevated Dog Feeding Station by Ugly Duckling House
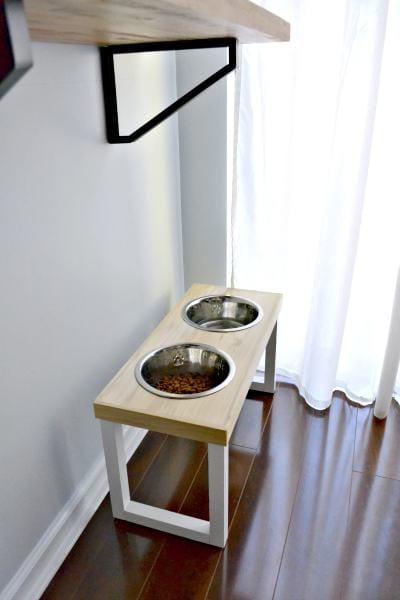
| Materials: | 12 X 24-inch poplar board, (3) poplar strips, (3) pre-primed stair balusters, (2) dog bowl with lip edge, (6) non-slip gripping pads |
| Tools: | Straight ruler, measuring tape, pencil, razor blade scraper, ½-inch Forstner bit, jigsaw, clamps, sandpaper, wood glue, wood putty, paint stain |
| Difficulty Level: | Beginner |
This no-slip dog feeding station will eliminate spillage problems. This project is ideal for beginner DIYers, and you don’t need a ton of tools and materials to complete the job. The non-slip gripping pads will keep the feeder in place, and it’ll look great in any home.
The instructions are clear-cut and easy to follow. For those who like visuals, the instructions come with pictures. The non-slip pads not only keep the feeder in place but also protects hard floors from damage.
Benefits of Raised or Elevated Dog Feeders
For senior dogs, eating from the ground may prove challenging due to mobility or orthopedic issues1, such as hip dysplasia or arthritis. When your dog eats from a raised or elevated bowl, less strain is put on the joints, making eating and drinking much more pleasurable for your pooch.
Some argue that raised food bowls can cause bloat1 in large and giant breeds, and we recommend consulting your veterinarian before using an elevated food bowl for your dog.
How High Should the Bowls Be?
To measure the ideal height, have your dog stand like normal with its legs underneath the body. Grab some measuring tape and measure from the floor to your dog’s chest. Next, measure from your dog’s shoulders to the floor. Last, subtract three for smaller dogs and six for larger dogs. That number will be the correct height according to your dog’s size.
Final Thoughts
Elevated or raised dog feeders are an excellent option for senior dogs or dogs with mobility issues. These feeders put less strain on your dog while eating, and spills and accidents are greatly reduced. All the plans mentioned will help you be on your way to building your own dog feeder, and you can customize it to your liking.
We hope our article helps you build the perfect dog feeder for your pup’s needs. Good luck, and have fun!
Featured Image Credit: Alicia Fdez, Shutterstock


