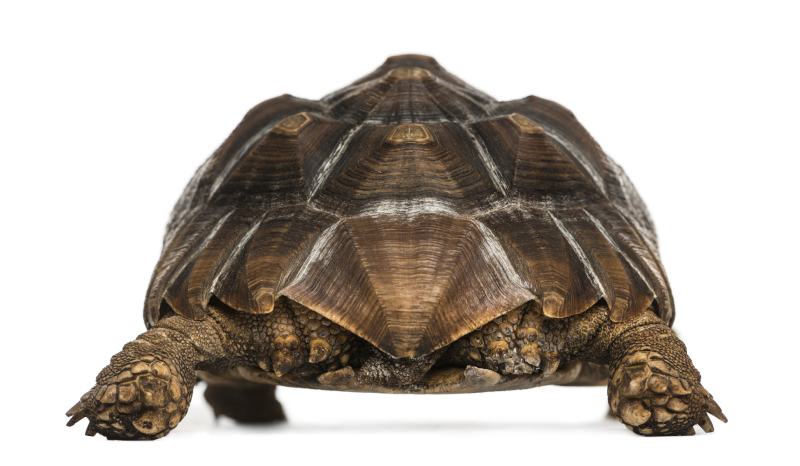
15 Sturdy DIY Turtle Basking Platform Plans You Can Make Today (With Pictures)

Updated on

Click to Skip Ahead
Turtles need a spot to dry their shell and take a break from swimming, which is why basking platforms are essential. They enable your turtle to warm up under a heat lamp and sit still after a lengthy swim. While shop-bought basking platforms are among the most sturdy designs that you can get, they’re also expensive.
DIY plans are cheap and effective and can be made with anything that you have on hand. Here are a few sturdy DIY projects made from egg crates, wood, acrylic sheet, plastic totes, and miscellaneous materials. They all range in difficulty to suit a range of skill levels from new DIYers to experienced carpenters.

Top 15 DIY Turtle Basking Platforms
Egg Crate Plans
1. DIY Three Step Turtle Dock by Boneyman
| Materials: | Egg crate, plastic ventilation cover, zip ties |
| Tools: | Pliers, tape measure, hacksaw, file |
| Difficulty Level: | Easy |
The simplest designs that you can make might look boring, but they’re effective and perfect for giving your turtle a spot to dry their shell. This Three-Step Turtle Dock is made with an egg crate and uses a plastic ventilation cover as a ramp.
You only need a few tools, which makes this design perfect if you’ve never done a DIY project before. Grab pliers to cut the egg crate, a tape measure — or your tank — to measure the size of the platform that you need, a hacksaw to cut the ventilation cover, and zip ties to secure everything in place.
2. DIY Above Tank Basking Platform by The Animal House
| Materials: | Egg crate, aquarium plants, reptile carpet, heat lamp, slate, chicken wire |
| Tools: | Tape measure, permanent marker, pliers, zip ties |
| Difficulty Level: | Moderate |
One of the hardest parts of this Above Tank Basking Platform is measuring the size of the tank and the pieces of egg crate that you need to cut. You’ll need a reliable tape measure and a permanent marker to accurately measure everything. Take care to measure the inside lip of your turtle tank so the basking area can rest securely on top.
This DIY plan is a good way to practice your decorating skills, and you can use plastic aquarium plants and reptile carpet to give the basking area a wild but natural look. A piece of slate for your turtles to bask on also makes a nice touch.
3. DIY Egg Crate & PVC Basking Platform by The Turtle Girl
| Materials: | Egg crate, 2 ½-inch PVC pipes (5 foot), 4 ½-inch PVC couplers, 4 ½-inch PVC elbows, zip ties |
| Tools: | Pipe cutter or hacksaw, file or pliers, tape measure, pencil, scissors |
| Difficulty Level: | Moderate |
Egg crate and PVC pipe are among the cheapest DIY supplies that you can use to make a turtle basking platform, and this Egg Crate and PVC Basking Platform design is easy to make too. First, cut the egg crate to the size that you need, and then measure the pipes to the right size.
You’ll need two 5-foot pieces of ½-inch PVC pipe, four ½-inch couplers, and four ½ inch elbows for the framework. Make sure you get the 90°, side-outlet elbows for sturdier construction.
Once you’ve formed the framework and made sure all the pieces fit tightly together, secure the egg crate in place with zip ties. When you set it inside your tank, fill the pipe with water so it doesn’t float.
4. DIY Egg Crate Basking Spot by Chewy’s Bro Aquatics
| Materials: | Egg crate, spray paint (optional), zip ties, reptile carpet |
| Tools: | Tape measure, permanent marker, pliers |
| Difficulty Level: | Moderate |
Despite the simplicity of the designs that it’s used in, egg crates are an incredibly useful material when it comes to turtle basking areas. This Egg Crate Basking Spot is an easy design that only needs a bit of work to put together. It can be resized to suit your setup and painted so it looks more like part of the aquarium.
The best part is that you don’t need many supplies or tools, and it’s a great way to start getting into DIY projects. You’ll need a tape measure, pliers, and a pen or pencil, along with an egg crate, zip ties, and reptile carpet.
Wood Designs
5. DIY Wooden Floating Turtle Dock by Mr. Turtle Dude
| Materials: | Wooden dowel, suction cups, 1×8 wooden board, rope or wire (optional) |
| Tools: | Drill, tape measure, hacksaw, hot glue gun, pencil |
| Difficulty Level: | Moderate |
Wood is one of the sturdiest materials that you can use to make a basking dock for your turtle. This Floating Turtle Dock is cheap and only takes a bit of work to put together. There aren’t many supplies that you need either, which makes this a good DIY project if you’ve got scrap material that you’ve been meaning to use.
You’ll need wooden dowels, suction cups, and a 1×8 wooden board or any board that you have on hand. As for tools, you only need a drill, hacksaw, and a hot glue gun, along with a pencil and tape measure to make markings.
Once you’ve finished this project, you can ensure that this dock is extra secure by fixing it in place with rope or wire if it moves too much in the water.
6. DIY Bamboo Raft by Pawty Time
| Materials: | Bamboo sticks, suction cups, string or rope |
| Tools: | Super glue, hacksaw (optional), tape measure, scissors |
| Difficulty Level: | Easy |
If you prefer a more natural look for your turtle’s basking dock, this Bamboo Raft will give your aquarium a rustic appearance. It’s also one of the easiest DIY projects that you can try and doesn’t require much work.
You’ll need a few tools, such as a tape measure and a hacksaw, to cut the bamboo sticks to the right size. Tie the sticks together with string or thin rope, and give the raft extra security with super glue. Finally, remember to add a pair of suction cups to hold it still in the water.
7. DIY Above Tank Basking Shelter by Long Live Your Turtle
| Materials: | Wooden boards, plywood, acrylic sheets, vinyl adhesive tiles, aquarium silicone, glue, wood putty, small wood door knobs, plastic track set |
| Tools: | Jigsaw, heat gun, paintbrush, drill, tape measure, putty knife, clamps, paint, screws, corner brace |
| Difficulty Level: | Hard |
This Above Tank Basking Shelter is one of the most expensive and time-consuming DIY plans on this list. While it takes a great deal of effort to put together and skill with tools, it has detailed blueprints and a handy video to follow. If you want a challenge to test your DIY abilities, this project is it.
Although this design is intended for a 75-gallon aquarium, you can adjust the size for your needs if you’re familiar with carpentry and using blueprints.
8. DIY Grecian Themed Basking Area by Long Live Your Turtle
| Materials: | Plywood, poplar boards, pine wood, LED strip light and connectors, acrylic sheet, vinyl tiles, wood glue, silicone, epoxy, paint, 12 Grecian columns |
| Tools: | C-clamps, large square, tape measure, saw horse, caulking gun, acrylic knife, painters tape, wood saw, hammer, scrap wood, finishing nails |
| Difficulty Level: | Hard |
Simple designs are often useful but hardly eye-catching. This Grecian Themed Basking Area is stylish and sure to catch the attention of anybody who visits you and your turtle. It isn’t easy to make, though, so you’ll need plenty of spare time and experience with tools and reading blueprints.
Fortunately, the video is split into parts and accompanied by an easy-to-follow blueprint. It isn’t the easiest or cheapest turtle basking area that you can make if you’re a beginner. However, it’s a fun and rewarding challenge if you want to test your skills with something new.
9. DIY Natural Log Basking Area by DIY Reptiles
| Materials: | Driftwood, wood screws, 2×4 wood, wood boards |
| Tools: | Drill |
| Difficulty Level: | Easy |
The biggest issue that many turtle lovers have with DIY basking platforms is the fact they don’t fit in with the rest of the aquarium décor. This Natural Log Basking Area can take a bit of work to attach securely to the side of your tank, especially if you use an oddly shaped piece of driftwood. However, once it’s fastened properly, it provides a secure and natural basking area for your turtle.
It’s smaller than many other designs and might need adjusting if you have bigger turtles or more than one. Use two pieces of driftwood to make a large platform or to provide an extra basking area.
Acrylic Designs
10. DIY Acrylic and Aluminum Basking Tank by Builds by Alexis
| Materials: | Acrylic sheet, aluminum angles, painting tape |
| Tools: | Super glue, acrylic cutting tool, jigsaw, blow torch, clamps |
| Difficulty Level: | Hard |
This Acrylic and Aluminum Basking Tank is reminiscent of an actual aquarium. Similar in style and appearance, it blends in well with your existing tank and is much more aesthetically pleasing than some other simpler designs.
However, it isn’t one of the easiest DIY projects to make. You’ll need to set aside plenty of time to carefully cut the acrylic sheet, securely glue the pieces together, and even bend the plexiglass for the ramp. While it has many fiddly parts — such as gluing the aluminum angles to each edge —the result is worth the effort.
Plastic Totes
11. DIY Tank and Basking Platform (Spanish) by JMGH Aquariums
| Materials: | Two plastic totes (different sizes), plastic sheet or plexiglass, plastic mesh, aquarium stones |
| Tools: | Stanley knife, aquarium silicon, file |
| Difficulty Level: | Easy |
Everyone has to start somewhere and if you can’t afford a large aquarium, you’ll need a tank for your turtles and a basking platform. This DIY Tank and Basking Platform design can help here. Using two plastic totes of different sizes, you can make a sturdy basking platform and a DIY tank with plenty of space for decorations and your turtles to swim.
You’ll need a piece of plastic to place the smaller tote on for the basking platform and a sharp knife to cut the side out to make the ramp. With plastic mesh, aquarium stones, and a file to smooth the rough edges, your basking platform is complete.
12. DIY Affordable Plastic Basking Area by The Turtle Girl
| Materials: | Plastic tote, zip ties, wire coat hanger, plastic sheet, L brackets, rubber shelf liner |
| Tools: | Drill, pliers or cutters, knife |
| Difficulty Level: | Easy |
Simple and cheap designs aren’t always ideal for beginners, but fortunately, this Affordable Plastic Basking Area is budget friendly and easy to make. This DIY design is intended to sit on top of your aquarium, so remember to fasten it to a wall with L brackets and screws or fix it to the top of your tank to keep it secure.
You’ll need a plastic tote that’s a suitable size for your turtle, wire coat hangers or rope, a plastic sheet for extra stability, and zip ties. A sharp knife to cut the ramp along with a file to smooth any rough edges will be useful too.
Other Materials
13. DIY Aquarium Basking Area by The Fish Corner
| Materials: | 10-gallon aquarium, ceramic tile, vinyl tile, egg crate |
| Tools: | Knife, safety glasses and gloves, vacuum cleaner, pliers, hammer, old towels |
| Difficulty Level: | Moderate |
If you have a 60-gallon aquarium, this Aquarium Basking Area is made from a much smaller, 10-gallon tank and is the perfect size to sit on top. The plan is easy to follow but it does require breaking the bottom panel of glass out of the small tank, which can make a mess. Make sure you wear safety goggles and gloves, and place a towel beneath and inside the tank while you carefully break the glass.
Once you’ve removed the glass panel, cut a ceramic tile and egg crate to the right size for the basking platform. You can also make the ramp out of the egg crate or use a more natural-looking log from a pet store.
14. DIY Turtle Basking Platform by Happy-Go-Lovely
| Materials: | Patio tile, floating aquarium dock, suction cups, wire, zip ties |
| Tools: | Utility knife, hacksaw, pliers, tape measure |
| Difficulty Level: | Easy |
This Turtle Basking Platform relies on upcycled materials, such as a leftover patio tile from IKEA. It also has an aquarium dock that you can purchase from a pet store and might already have on hand if you’re updating your old basking platform. You can use the suction cups from the original basking platform too.
Some of the parts are fiddly, but overall, this is a simple DIY plan that doesn’t need much work or tools. You can also replace the patio tile with egg crate if necessary.
15. DIY Cork Bark Basking Platform by Pattasy
| Materials: | Cork bark |
| Tools: | Hacksaw, tape measure |
| Difficulty Level: | Easy |
A natural-looking basking platform can be made from cork like this Cork Bark Basking Platform. Compared to the intricate parts of some other plans, this one is by far the easiest and quickest project that you can try.
All you need to do is cut the cork bark slightly bigger than your aquarium to ensure a tight fit — you can trim it if necessary — and then push it into place. The natural curve of the cork bark acts as a natural ramp for your turtle to climb up.
If you’re worried about the material contaminating your tank, the cork bark in a separate bucket with salt water to destroy any potential bacteria.

Conclusion
Sturdy turtle basking areas can be made of anything from egg crates to old aquariums that you no longer use. DIY options might not look as pretty as shop-bought options, but they’re incredibly effective. Time, effort, and careful use of tools can be a rewarding challenge, and you can provide your turtle with a spacious and affordable basking platform. We hope that this list has given you a few ideas for your own DIY basking platform project to upgrade your turtle’s habitat.
Featured Image Credit: norberto, Shutterstock