How to Change Betta Fish Water: 5 Step Guide (Vet-Approved!)
Updated on
Click to Skip Ahead
If you are a beginner and new to the aquarium hobby, you may be confused about how to go about changing your betta’s tank water. This is a process that is widely discussed, yet you may be confused why you even must change the water in the first place. You may also have many questions, such as if you should do a water change even if you have a filter or how to conduct a water change while a tank is cycling.
While all of this can be a daunting task, this article is going to dive deep into how you can conduct a proper water change with as little effort as possible while providing you with tips on how you can ensure that the water is kept as clean as possible. Which will minimize the number of water changes you have to do.
Why Should You Change Your Bettas Water?
Essentially, a small body of water can quickly foul up due to your bettas waste and rotting food. In the wild, there are enough environmental aspects to naturally control the waste present in the water. There are plenty of algae, large plants and organisms that can naturally break down the waste. Sunlight naturally sterilizes the water on a daily basis, and fresh rainfall or melting snowcaps replenish the water in a wild Betta’s habitat.
However, in a tank, there is nowhere for the waste to go once it has been converted through the nitrogen cycle. This makes it important to remove a percentage of the old water and replenish the tank with fresh, dechlorinated water. Thus, lowering the amount of waste and toxins that have built up in the tank over time.
How Much Water Should You Change?
The amount of water that should be changed depends on two factors, the amount of stocking in the tank and the size of the tank. Both play a role in the overall water quality. If you have a lot of tank mates with your betta fish, the toxins will accumulate rapidly, and you will therefore need to do water changes more frequently. Whereas in a small tank, the water to toxins ratio can quickly become more dangerous than if it was a large tank with an appropriately sized body of water.
Let us have a quick look at water changing checklist according to the size of the tank:
| 5 gallons | 25-30% water change weekly |
| 10 gallons | 20-25% water change weekly |
| 15 gallons | 15-20% water change weekly |
| 20 gallons | 10% water change weekly |
Please note that the table above assumes just one betta is housed in the aquarium with an appropriate filter. If you have more fish (a higher bioload), you will need to perform more water changes. The table above is also a rough guide, and not the amount of water you need to change may depend on other factors as well (such as the amount of live plants in your aquarium).
Tips to Keep the Water Clean
- Use an appropriate filter for your aquarium. As a rule of thumb, a tank’s filter should be able to filter at least twice the tank’s expected water volume in under an hour (for example, a 10 gallon aquarium should have a filter that’s rated at 20 gallons per hour).
- Do not overfeed your betta fish because the food will start to rot in the water if it has not been eaten.
- Avoid placing dirty hands inside of the tank and rather use a net to move things around.
- Ensure that the tank has been fully cycled before adding in the betta fish. The nitrogen cycle is the accumulation of nitrifying bacteria that turns ammonia into nitrate which is a less toxic version of ammonia. The cycle can take up to 8 weeks. It is best to do a fishless cycle by using household ammonia (found in most hardware stores). This is the safest and quickest way to perform a tank’s cycle.
Tank or Bowl?
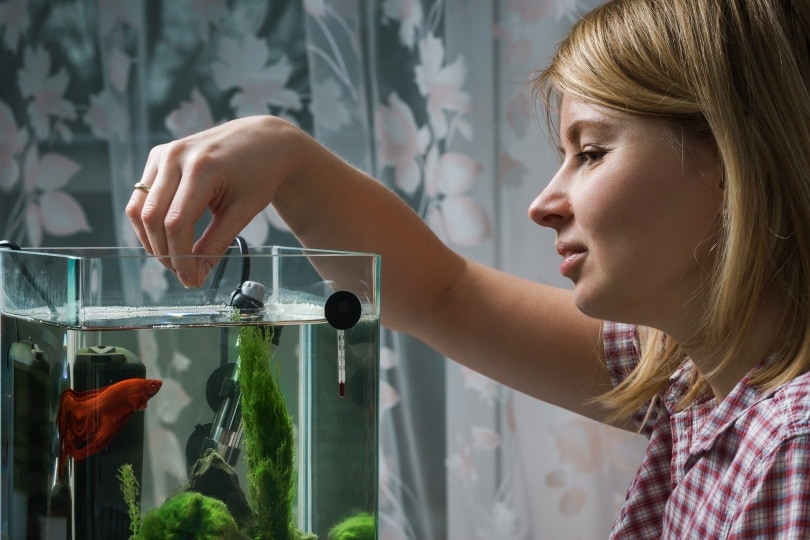
Many people believe that they can get away with keeping their betta fish in a bowl by doing 100% water changes weekly. This is simply not true, and it is best to avoid housing your betta fish in an appropriate aquarium. A standard rectangular tank is a way to go. Bowls, bio-orbs, and vases are way too small to comfortably house a Betta.
The Role of a Filter in a Betta Tank
Filters are there to suck up debris and water and filter it through the inside of the system, to then release clean and nitrified water back into the tank. Having a filter in the tank does not mean you do not have to do water changes; it just helps keep the number of water changes significantly less which means less work for you.
- Mechanical filtration: traps and removes debris from the water
- Biological filtration: beneficial bacteria colonize the filter (often in bio balls) and help neutralize ammonia and nitrite in your aquarium.
- Chemical filtration: filters with a chemical filtration component (such as activated carbon or charcoal) absorb harmful chemicals that may enter the water
- UV lights: some filters come with a UV-light which sterilizes the water as it passes through the filter.
How to Change Your Bettas Water in 5 Simple Steps
1. Gather a large bucket and a siphon.
Turn off the filter and heater before you proceed with the water change. If you run a heater and filter when they are not fully submerged may cause them to break and burn out. Please note that turning off an air pump (if you use one in your tank) may cause water to flow from the tank into the pump, causing damage to the product. It’s advised to keep your air pumps at a level above your tank to prevent this from happening.
2. Place the siphon in the tank and place the smaller tube in the bucket.
Please note that Bettas can jump! Be careful when opening the aquarium lid and starting your siphon.
3. Pump
Pump or suck at the end of the siphon until the water is pouring into the bucket. Focus your gravel vacuuming efforts along the bottom of the tank, moving along the gravel or substrate to pick up any dirt and debris your filter may have missed.

4. Stop
Stop once the recommended volume of water is removed according to the necessary percentage of water you are changing.
5. Replace the water
Replace the water with fresh water in the bucket that has been dechlorinated to remove chlorine. Slowly pour it into the tank and then turn on all the equipment your aquarium uses.
Benefits of Gravel Vacuuming
Sometimes changing the water is not enough to keep the toxins down. You may need to use a gravel vacuum to suck up waste and leftover food between the substrates. Food left to rot in the substrate can cause major problems with water quality. It may also be necessary to lift rocks or driftwood to suck up any trapped debris. Gravel vacuums are generally inexpensive and easy to find in local pet stores.
Wrapping It Up
Changing your betta’s water does not have to be a difficult task, and it can be made easy by following the proper procedures. Ensuring the water quality is kept clean using a filter and nitrifying bacteria is just as important. Your betta will be much healthier and happier if they are kept in clean water conditions. This will reduce the risk of ammonia burns, popeye, and fin rot, all of which are common problems if your Betta is kept in dirty water.
See also:
- 12 Safe Betta Fish Tank Mates: Vet-Approved Compatibility Guide
- Fish Tank Cycling & New Tank Syndrome: Understanding & Preventing Them
Featured Image Credit: MANU PARADY, Shutterstock


