How to Set up a Freshwater Shrimp Tank: Vet-Approved Step-by-Step Guide
Updated on


Freshwater shrimp are an excellent addition to an existing peaceful community tank. They will keep the algae and excess food under control with their scavenging. You can’t keep them with all fish, though. They are slow-moving and vulnerable to predation. Another way to enjoy these crustaceans is to set up a dedicated shrimp tank.
Species vary in their tolerance for the main water parameters. Many can live in the same conditions as tropical fish. Our guide focuses on an aquarium for keeping shrimp only. You’ll undoubtedly recognize many steps as similar to fish. The overriding difference is the feeding habits of the crustaceans. Many are filter feeders, making water quality a priority.

Before You Start
Shrimp need stable water conditions. These crustaceans don’t do well with sudden water parameter shifts. That has limited these species’ ability to adapt. Many are peaceful and make excellent tank mates. However, they are also prey species that aren’t particularly long-lived. Of course, there are exceptions to these rules.
Shrimp lack the power to get out of harm’s way with a power filter. Therefore, your setup must take this fact into account. Some are easy to breed in captivity, making selective breeding an option for enthusiasts. You’ll find many variants in various colors and patterns. Prices can vary widely, with the more desirable ones fetching big money.
The setup mirrors that of tropical fish, with a few modifications. However, it isn’t simply a matter of filling a tank and tossing in some shrimp. Our guide addresses this issue.
- 10-gallon tank
- Hood with a light
- Filtration system
- Heater
- Thermometer
- Substrate
- Hiding places
- Plants
- Water conditioner
- Water test kit
- Ammonia source
- Bucket
- Plate
- Siphon
Please note: Larger aquariums are definitely a possibility and allow for larger colonies of shrimp.

The 10 Steps on How to Set up a Freshwater Shrimp Tank
1. Research Shrimp Varieties
Shrimp varieties come in an array of colors that you’d expect to see only with marine biota. After all, some are hardly good camouflage for a prey species. Nevertheless, we suggest starting with research. The variants give you a chance to color-coordinate your tank. They can also influence product choices. Some have grades of color patterns, such as the red cherry shrimp, which can affect the price you pay.
Shrimp of the same genus or family can interbreed. Though this may sound appealing at first, it’s not recommended to allow this. The hybrids are often genetically weak and many shrimp must be culled. They also tend to lack the vibrant colors of their parents and tend to appear as dull shades of brown.
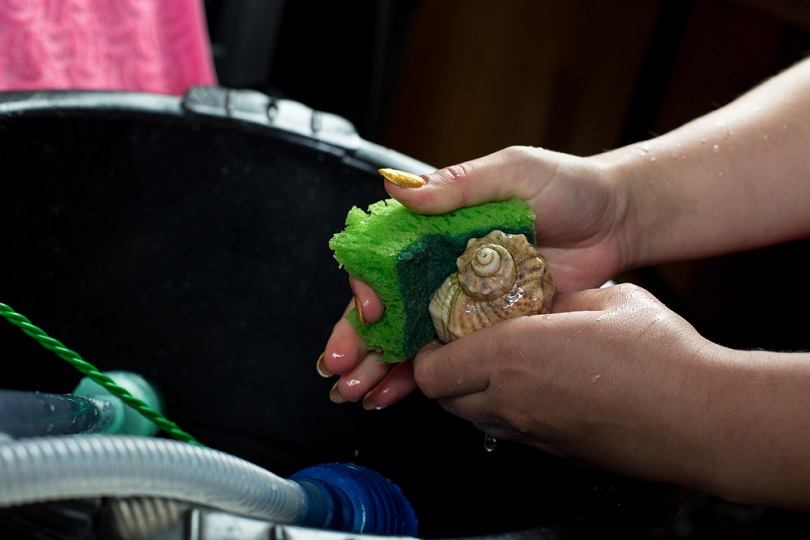
2. Prep Your Materials
You should prep any items going into your aquarium before adding water. That means rinsing any plants, décor, and hiding places. The goal is to prevent any unwanted materials from entering the environment and jeopardizing the lives of your shrimp. We also recommend inspecting your tank. You might even consider filling it an inch or so to determine if there are any leaks.
3. Condition the Water
Chlorinated water is dangerous for aquatic organisms. You can leave out the water in clean buckets exposed to sunlight and the air to dissipate chlorine; however, this does not get rid of heavy metals found in most tap water. You should cut to the chase by using a water conditioner. It’s imperative to follow the manufacturer’s instructions exactly, particularly with the amount you should add.
4. Rinse the Substrate
You should also rinse your substrate thoroughly until the water isn’t cloudy. Do it even if the product’s label says it’s pre-washed. Many hobbyists opt for dark-colored gravel to spotlight the showy colors of their shrimp. It’s worth noting that the colors may fade in some varieties when instinct kicks in and puts camouflage on the front burner.

5. Add the Décor
The chances are that your décor will take up the most room in your tank. It’s an excellent time to play around with the design while it’s without water. You can anchor items into the substrate to ensure they stay put during your routine water changes. Shrimp need places to hide, even if you have a community tank. It gives them a sense of security and reduces stress.
6. Pour the Conditioned Water Into the Tank
You should fill your tank halfway using an overturned plate to prevent upsetting your layout. Then, all you need to do is finish the following steps before topping the tank off.
7. Install the Heater, Thermometer, and Filter
Stable conditions are essential for shrimp. The heater will take care of the temperature, with a thermometer to verify it. Filtration is necessary, but it shouldn’t overwhelm your shrimp. A sponge filter will keep the water chemistry within healthy parameters. It’s a good time to ensure these items are working.

8. Add Plants if Using Them
If you plan on adding live plants, now is the time. You can anchor them into the substrate to help them take root. Some shrimp will eat any dead or decaying plants to keep the conditions safe. These crustaceans are often opportunistic and will feed on whatever they can find.
Please note: Plants may sometimes harbor snail eggs or other critters. If you don’t desire these in your aquarium, you should quarantine your plants to ensure you do not introduce unwanted guests to your aquarium.

9. Finish Filling Your Tank
Once you’ve determined that everything is where you want it, you can finish filling the tank using the overturned plate and gently pouring the water over it. Plug in the heater, hood, and filter. Don’t worry if the water is cloudy. That’s normal despite the prep you’ve done. The particulate matter will settle before you add your shrimp.
10. Cycle Your Tank
The final step is undoubtedly the most critical. You must allow your tank to go through the nitrogen cycle. It is the biological process that will keep waste and its associated toxins under control via beneficial bacteria. You can add pure ammonia to obtain a concentration of 2 ppm to get things rolling. Bacteria will convert it to nitrites and nitrates that will feed your live plants.
Conclusion
Setting up a shrimp tank involves time and patience. These crustaceans require stable conditions, which the proper setup ensures. The steps you must take are similar to those for tropical fish. However, the shrimp provide an added twist with their color variations and the different temperaments of the organisms. In any case, you’ll get an excellent algae scavenger in the process.
- Related Read: How Do Mantis Shrimp Break Glass? Facts & FAQ
Featured Image Credit: Andriy Kotlyarov, Shutterstock