10 DIY Cat Wall Playground Plans You Can Build Today (With Pictures)
Updated on

Click to Skip Ahead
It’s no secret that your furry feline friend loves to climb, and you’ve probably even come home to find him on top of your kitchen cabinets or refrigerator before. Some cats climb just for fun, while others climb to feel safe or just to get away from something (ahem, the dog.)
Instead of your cat jumping and climbing on top of your furniture, and potentially knocking all the things over in the process, why not build a cat wall playground? There are many plans out there that are easy to build yourself in as little as a weekend or even a day.
Whether you just want something simple or something a little more complex, we’ve shared some of the best DIY cat wall playground plans. That way, you can find a plan that suits your space, your wants, and your needs as well as keeps your cat(s) entertained and off of your refrigerator.

The Top 10 DIY Cat Wall Playgrounds
1. DIY Cat Shelves – Adventureratheart
| Tools: |
Screwdriver |
| Supplies: |
Two 1″ x 12″ x 8′ pine boards, 6″ x 6″ x 8′ post 100 feet of 3/8″ natural, Sisal rope One 6′ x 8 ‘ roll of indoor/outdoor recycled carpet, Velcro fasteners to attach the carpet to the wood shelves |
These DIY cat shelves are one of the simplest and most budget-friendly cat wall cat playground plans there is. For this particular plan, all you need is two 1” x 12” x 8’ pine boards and 12 shelf brackets. With just those materials, you can make six cat shelves by attaching the brackets to the underside of the wood and the wall.
What’s great about this plan is that it is very easy to personalize. You can stagger the shelves how you want to, plus use whatever shelf brackets you want to, whether they be plain or decorative. For more personalization, you can also stain or paint the wood to match your decor.
You can also attach carpet scraps to the shelves with Velcro so that your cat is more comfortable. And by using the same basic plan but buying more wood, you can make more than six shelves if you have multiple cats or want to make a bigger playground.
2. DIY Cat Climbing Wall – Madlab5.blogspot

| Tools: |
Router with a Roman ogee bit, tape measure, drill, sandpaper, razor blade, scissors |
| Supplies: |
1″x8″ pine boards, primer, white interior paint, carpet, brackets, drywall screws |
How fun does this cat climbing wall look? This is definitely a great cat wall playground idea for the more energetic cats (and the most adventurous of cat owners) that is so unique from traditional cat wall playgrounds. Carpet tiles are used to make the wall itself, and then you can add as many shelves as you want to in addition to the climbing wall.
To make the climbing wall, you’ll need some 2’ x 2’ carpet tiles. These are free or very inexpensive at most carpeting stores. Measure the amount of wall space you want to cover to know how many you need. Mount the carpet to the wall using drywall screws in whatever shape you want to (this one is done vertically). The carpet tiles can also double as a scratching post for your cat.
After mounting the carpet to the wall, add some shelves made out of pine board (in whatever dimensions you want). Stain the shelves or add carpeting to them as well, then attach them to shelf brackets and mount them to the wall in whatever arrangement you prefer. Your cat is sure to love the challenge of climbing the wall and jumping from shelf to shelf.
3. DIY Floating Cat Shelves – Brooklyn farm girl

| Tools: |
Screwdriver, level, drill |
| Supplies: |
Shelves, screws, wall anchors, carpet |
This floating cat shelf plan is another super easy and inexpensive plan that can be completed in just a few hours. The difference between this plan and other plans is that this cat wall playground is made from ready-made floating shelves with carpet attached to them.
You can buy floating shelves at pretty much any home improvement store, and they already come with the materials needed to mount them to the wall. The only thing is that some shelves can only support a certain amount of weight, so you will need to be sure to buy shelves that can support the weight of your cat or buy wall anchors that can support more weight.
You can also buy floating shelves in different lengths and widths as well. But in this particular plan, 18-inch and 24-inch-long shelves were used. The shelves were first covered in carpeting to provide traction and comfort when the cat lands from jumping between them. You can attach them with Velcro so that the carpeting can be easily removed. Arrange the shelves to resemble a staircase (or whatever arrangement you prefer and your cats love).
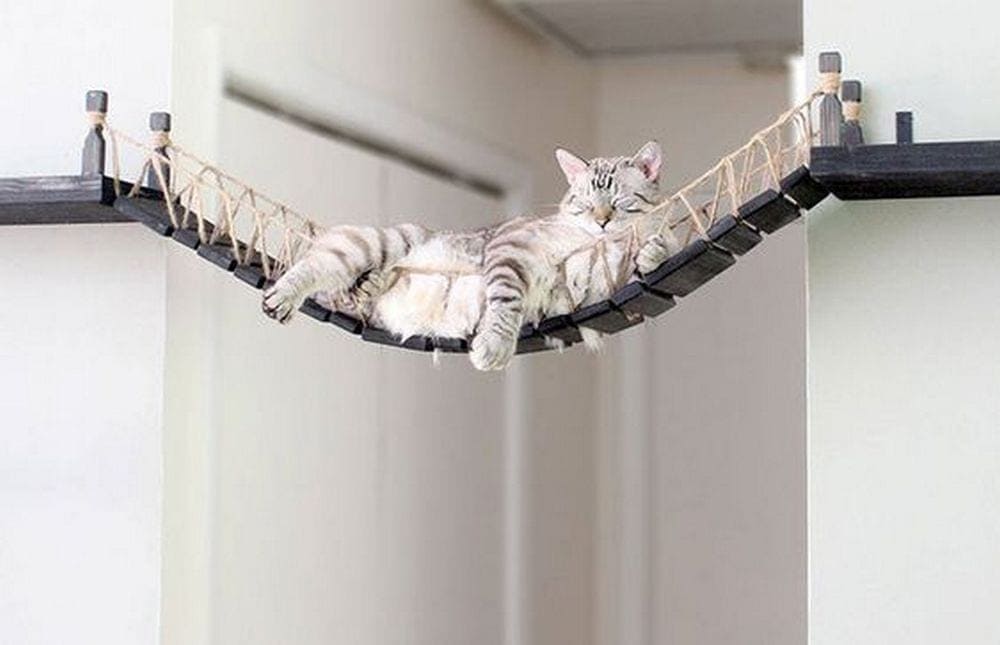
4. DIY Cat Rope Bridge – Project the owner builder network
| Tools: |
Sander, Paintbrush, Measuring tape, Circular saw, Drill with the drill bit |
| Supplies: |
Plywood, Upholstery tacks, Joints, Shelf brackets, Carpets Sisal ropes, Varnish, Wood glue, Screws, Screw plate |
Cat shelves are fun and all, but you can really take your cat’s wall playground to the next level by adding a DIY rope bridge. Rope bridges give your cat a break from jumping and allow him to walk from one shelf to the next. Or, he can just lay down and relax on it instead.
This is an advanced DIY project, but you can do it as long as you have the right tools. The key is to make the bridge sturdy enough to support your cat’s weight because obviously, you don’t want your cat to fall off of it and get hurt.
As far as materials that you’ll need, this plan requires plywood, carpeting, and sisal rope as well as brackets and screws. You’ll also be using a sander, circular saw, and drill, so if you aren’t sure how to use them or don’t have them, you may have to elicit the help of a friend or relative.
Once you’ve finished the bridge, mount some shelves to the wall as well following one of the other plans above. This project requires a lot of hard work, however, the results are totally worth it.
5. DIY Colorful Cat Shelves – Plaster and disaster

| Tools: |
Brush, Wood Sand, Scissors, Screwdriver, Drill |
| Supplies: |
Wood Board, Paint, Screw |
This colorful cat shelf plan is great for that wall space that you just don’t know what to do with, or if you have a small space that needs to be utilized. The wood used for these shelves is stained, while the brackets and screws used for each shelf are spray-painted in a different color.
For this particular plan, you’ll need eight feet of 1” x 6” lumber (although you can use lumber with a larger width to give your cats more room on the shelves). Cut the eight feet of wood up in four equal lengths, stain them, and attach brackets to them that are spray-painted in your choice of colors.
You can also get a few bigger pieces of wood to make a couple of larger shelves, and attach spray-painted brackets to them as well. To make these shelves work in a smaller space, mount them on top of one another, but staggered so that they aren’t in a vertical line. This will make it easier for your cat to climb them.
6. DIY IKEA Floating Cat Shelves – IKEA Hackers

| Tools: |
Drill |
| Supplies: |
Bergshult, Wall Anchors, Grey runner carpet, Velcro pads, Brackets |
Here’s another cat wall playground plan made by using IKEA products. This one uses GRANHULT shelves and brackets that look as if they’re floating once they’ve been mounted. These shelves were used in the corner of a room, alternating which wall they were mounted on to give it a stair-step effect.
The particular shelves that were used for this plan are 11 ¾” and 7 ⅞” in length, along with the corresponding brackets for those shelves. Carpet squares are also attached to the top of the shelves with Velcro. As far as how many shelves you use, that’s entirely up to you.
7. DIY Active Cat Climbing Wall – IKEA Hackers
| Tools: |
Drill |
| Supplies: |
Brackets, shelf, doormat, screws |
Cats love to climb as much as they enjoy jumping and running. This is likely why tales of cats getting stuck on tree branches and power poles are so common! So, it’s always a good idea to make sure your indoor cat has something to climb on, as it will help keep your furniture and curtains from becoming climbing toys.
This amazing DY cat climbing wall is the perfect option for anyone who’s on a budget and has a bit of wall space to spare. All you need is a big sisal rug, brackets, doormats, and a floating shelf to complete this project. You can embellish the climbing wall with more shelves, hanging toys, and even “climbing rocks” if you’re so inclined.
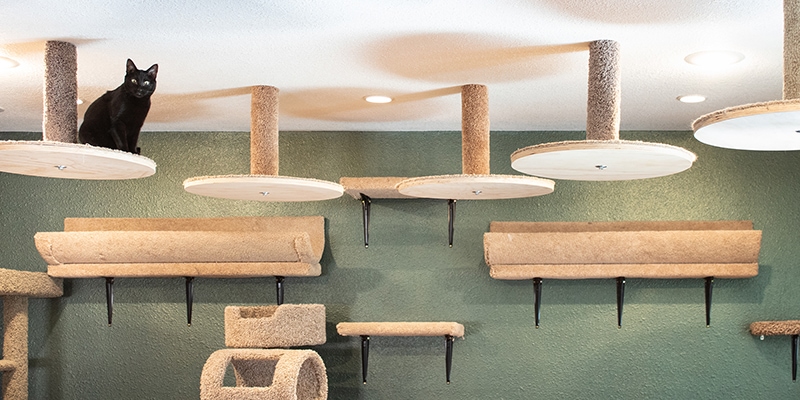
8. DIY Cat Superhighway – Haus Panther
| Tools: |
Drill |
| Supplies: |
Ceiling,Joist Sammy’s Threaded Rod, Hanger Nut, Plywood, Platform, Washer Nut, 3″ Lodge Pole Contersink |
This is less a set of DIY plans for a walled playground and more of a game plan to literally turn your home into a cat superhighway. Start with scratching posts connected to round platforms suspended to the ceiling. Then, add a few odd-shaped floating shelves. Paint awesome murals on the walls. Introduce floating catwalks and ceiling-height climbing posts.
Don’t expect to complete a project like this in a day or two. This should be considered an ongoing project that might take years to complete before you (and your cats) feel satisfied. Start slowly, and make additions as your budget and time see fit. Your cats are sure to love every aspect of their “super highway,” no matter how small it is at first.
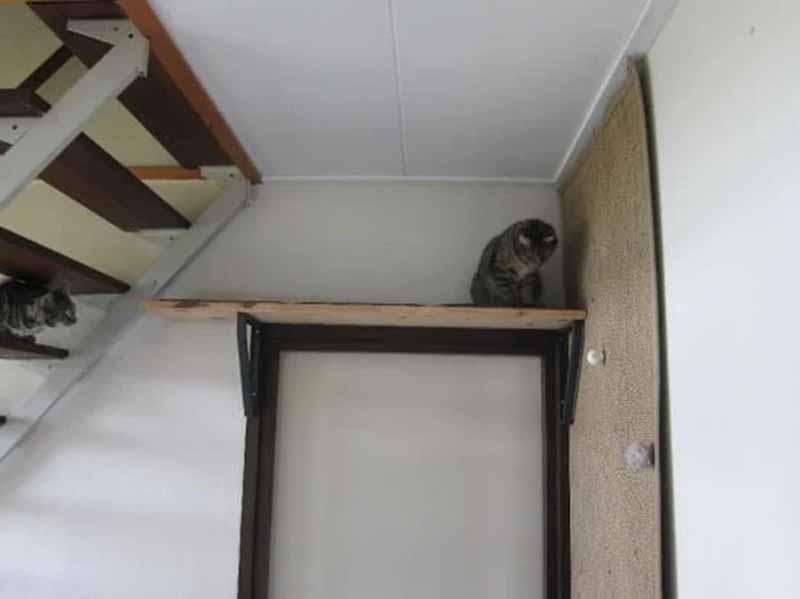
9. DIY Ceiling Walkway – IKEA Hackers

| Tools: |
LACK tables Angle iron (50 x 50 x 50 mm) |
| Supplies: |
Straight metal brace (40 x 80mm) Wood screws (25 – 35mm) Plastic wall plugs (5 mm) and matching screws |
A ceiling walkway is a perfect option for those who don’t have any extra wall space to give up for their cat’s exercise and amusement. There is no one way to complete this project for your feline family member, as you can suspend anything to the ceiling that will safely hold your cat, and then install a few floating shelves on one wall to provide access to the walkway that you end up creating.
Consider using end tables, plastic shelves, and hammocks as the walkway foundation. You’ll need brackets to secure your materials to the ceiling. Once in place, you might find that your kitty spends most of their time above your head, where they can easily see what’s happening throughout the house.
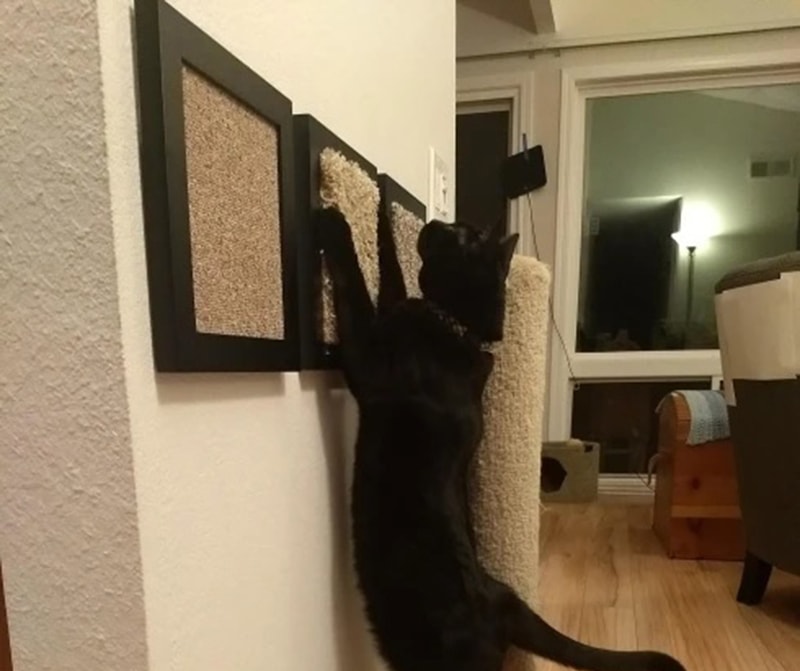
10. Carpet Cat Scratcher DIY Wall Mounts – Experimental Craft
| Tools: |
Squares, or samples a frame |
| Supplies: |
carpet remnants, Command picture frame adhesive and A cat to help, and judge. |
You can create a scratching wonderland on the wall for your cats to enjoy with nothing more than carpeting, lightweight wood or picture frames, and adhesive. The idea is to frame pieces of carpet (scraps from an old project would work great!) and then hang the frames on a wall where your cat(s) can reach them. Consider lining your hallway with these scratcher wall mounts.
You can place the mounts near furniture that tends to get scratched at, which will help redirect their attention. You can also put the scratchers in a closet or your garage if you don’t have space on the walls in the main areas of your home. As long as access is granted regularly, your cat won’t care where their scratchers are located.

The 4 Tips for Building a Cat Wall Playground
After seeing some of the ideas above, we’re sure you have lots of questions about building a cat wall playground. After all, using the wrong materials and equipment to build it could determine whether or not your cat actually uses the playground and whether or not the playground is safe.
Your cat isn’t going to like to use the playground if he feels that it is uncomfortable or unsafe. A couple of examples would be if he can’t lie down on the shelves or if the shelves wobble when he jumps or walks on them. With that being said, here are some frequently asked questions when it comes to building a cat wall playground.
1. How much space should a cat wall playground take up?
There’s no set rule for how much space a cat wall playground should take up. Some people have a lot of unutilized space that they can use, while others only have a small amount of space. Some cat playgrounds stretch outward along the wall, while others stretch upward (especially if you’re short on space). Ultimately, a cat playground can be as small or as large as you want it to be.
2. What should a cat wall playground consist of?
Again, there are no set rules here either. Some of the fanciest cat wall playgrounds consist of cat condos, ramps, hammocks, shelves, and even scratching posts. But, these are usually made with cat playground kits.
Some of the simplest DIY cat wall playgrounds consist only of shelves, while others have bridges, condos, ramps, etc. What you can make really just depends on how skilled you are at woodworking at building things because some DIY cat playground equipment requires a lot of skill to make.
At the very least, cat wall playgrounds should have shelves for your cats to jump and climb on. Even though shelves are simple, there are endless possibilities as to what sizes you can use, how you arrange them, and how many of them you use so you don’t have to worry about your cat playground not being good enough for your cats just because it’s made of simple materials.
And baskets, wooden crates, and even drawers can all be used to make cat playgrounds. As long as you can figure out a way to attach an item you plan on using securely to the wall so that it is safe, the creative possibilities are endless.
3. How wide should a cat shelf be?
How wide to make cat shelves is another common question that many people ask, because if the shelves aren’t wide enough for your cat to sit or lay on, he may not feel comfortable using them. But cats come in different sizes, so the best answer we can give is that the shelf should be wide enough for your cat or cats to lay on comfortably.
The good thing about something as simple as cat shelves is that you can make them wider or narrower even after installing them if they are mounted using brackets. If you see that your cat doesn’t fit onto a particular shelf, you can always take it down and remake a wider one. And remember, all of your shelves don’t have to be wide enough for your cat to lay down on, but a few of them should be.
4. How can you make sure cat wall playgrounds are safe?
Making sure the wall playground is secure is one of the most important aspects of building a DIY playground. You don’t want the equipment to fall off the wall, especially with your cat on it. The best way to make sure the playground is secure is to use brackets, wall mounts, and anchors as much as possible or wherever necessary to ensure that the equipment doesn’t move.
Know how much your cat or cats weigh so that you can make sure that any shelves, brackets, anchors, etc., can support that weight. And, make sure that any shelves, bridges, or other equipment are wide enough and spaced close enough together for your cat to be able to at least walk on or land on safely when jumping.

Final Thoughts
Although there are kits available for purchase that allow you to build your own cat wall playground, they don’t always fit your space or your budget. That’s why DIYing your own can save you money and ensure that the playground fits into your space while keeping your cat off of your other furniture as well. Hopefully, our plans at least gave you some ideas about where to start, but really the only limitation you have is your imagination when it comes to building your own.
Looking for more DIY cat projects? Try:
- 23 DIY Cardboard Cat House Plans You Can Build Today (With Pictures)
- 19 DIY Cat Tree Plans You Can Build Today
Featured Image Credit: RJ22, Shutterstock