10 DIY Hamster Cages You Can Build at Home (With Pictures)
By Kit Copson
Updated on

At some point or other, we’ve all been awestruck by those huge, brightly colored, playground-esque hamster cages in pet stores, only to take one look at the price tag and walk away. These commercial hamster habitats are certainly impressive, but they’re also expensive, and many are simply too small for hamsters’ needs. An alternative is to consider DIYing your own amazing hamster cage, which is less expensive and rewarding to make.
This guide shares DIY hamster cage plans by some very talented and thrifty creators. We’ve included plans that range in difficulty from beginner to advanced to suit all skill levels.

The 10 DIY Hamster Cages
1. DIY Hamster Cage by The Sorry Girls
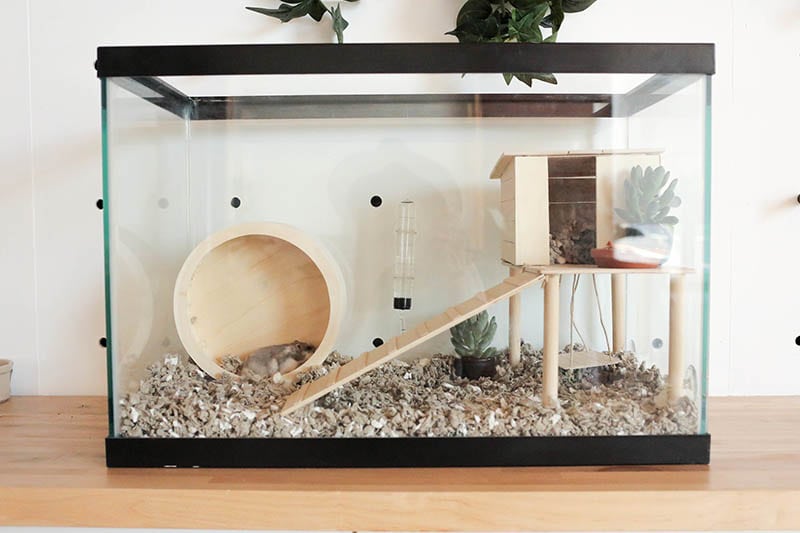
| Materials: | Aquarium, bedding, popsicle sticks, small nails, small cups, suction cups, plywood, wooden wheel, drinking tube, dowels, thin rope, wood glue, hot glue, toys & accessories |
| Tools: | Sandpaper, hammer, drill, glue gun |
| Difficulty Level: | Easy |
This DIY hamster cage was created by taking an aquarium and building some simple items like a wooden structure with a house on top and a ramp, all made out of plywood, dowels, and popsicle sticks. The items are put together with wood glue and a little rope/twine. When it was finished, the creators covered the bottom of the tank with bedding and added in some extra toys and accessories, like a water tube, wooden wheel, and hamster-safe plant.
We really love the sophistication and minimalist vibe of this hamster cage. You can adapt the aquarium size to your hamster’s needs—it looks like this one was built for a dwarf hamster. Budgeting tip: Look for second-hand aquariums to save money.
2. Hamster Bin Cage by wikiHow

| Materials: | Plastic bin with lid, hardware mesh, zip ties, pen, cage accessories |
| Tools: | Knife/razor blade, scissors, drill, wire cutters |
| Difficulty Level: | Easy |
If you’re looking for something super simple, you might want to spruce up a clear plastic bin, as shown in this wikiHow tutorial. A hole is cut in the top of the plastic bin, and the hole is then covered with hardware mesh for proper ventilation. It’s finished off by adding bedding and accessories to personalize.
We think this is a great idea, especially since you can get plastic bins very cheap. We also really appreciate the simplicity. Just check the size of your bin to make sure your hamster will have plenty of room to roam and play.
3. Ikea Hack: Bacon’s Hamster Condo by JessicaOfAwesome

| Materials: | 4×4 bookshelf, Lekman plastic bin, 3mm plexiglass sheets, hamster tubes, masking tape, electrical tape, zip ties, contact paper, hot glue, aluminum U-channel, hinges, nuts, bolts, finishing nails, small washers, various types of screws (check the plan for details), cage accessories |
| Tools: | Plexiglass cutter, hacksaw, screwdriver, power drill, drill bits, marker pen, hot glue gun, craft knife, wire cutter, hole cutter |
| Difficulty Level: | Difficult |
This impressive hamster condo has to be one of the most luxurious we’ve come across! It’s sure to be a bit of a challenge to put together, especially if you’re not very experienced with DIY, but the end result is certainly worth it if you’re up for it. The condo is made from a 4 x 4 Expedit bookshelf from IKEA, the upper part of which makes up the hamster’s habitat, while the lower part is used for storage.
4. DIY Hamster Enclosure by Victoria Raechel

| Materials: | Aspen plywood, varnish, caster wheels, glass, framing lumber, hardware cloth, locks, hinges, pet-safe silicone, mesh, cage accessories |
| Tools: | Drill, screwdriver, paintbrush, tape measure |
| Difficulty Level: | Moderate to difficult |
Hamsters might be small, but they need a big enough habitat for a good quality of life. This DIY hamster enclosure is deep and incredibly roomy, so hamsters are sure to love it. At times, it appears a tad finicky to put together, but, as the creator mentions in the video tutorial, it’s still possible to do it by yourself. The enclosure is built with plywood and glass and has a mesh covering on top for ventilation.
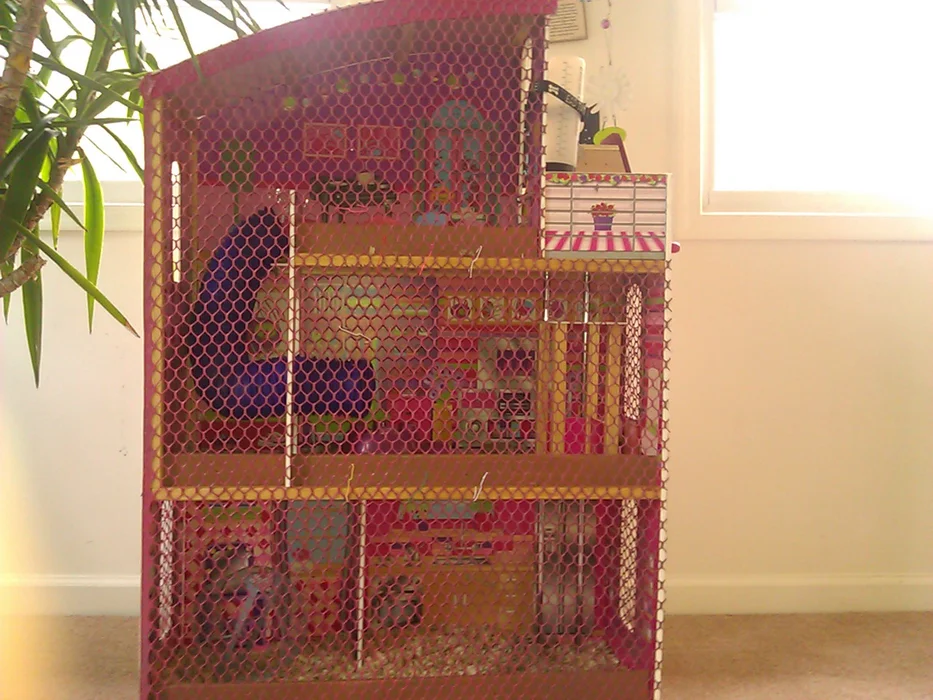
5. Hamster Mansion by 2rainonme (Instructables)
| Materials: | Old doll’s house, plastic fencing/netting, pet-safe spray paint (optional), glue sticks, paper clips, wood, cage accessories |
| Tools: | Hot glue gun, electric staple gun, razor knife or scissors |
| Difficulty Level: | Moderate |
If you buy a second-hand doll house or have an old one no longer in use, you could try repurposing it into a hamster mansion, like this one by a creator on Instructables. The creator adds a wooden base to the bottom of the old doll’s house and covers the front with outdoor fencing for ventilation and to prevent escape. In line with the doll’s house theme, spray paint is used to turn the fencing pink.
Be careful when choosing a spray paint as it may contain chemicals that could harm your hamster. If you use it, only use a pet-safe, non-toxic brand. We think this DIY hamster house (or rather, mansion) looks fit for rodent royalty and is a wonderful way to repurpose an unwanted or second-hand item.
6. DIY Hamster Cage by HoppingHammy

| Materials: | Table frame, plywood, contact paper, melamine wood, melamine shelf (optional), melamine edging, plexiglass, silicone, industrial-strength Velcro, cage accessories |
| Tools: | Tape measure, iron, gaffer’s tape, pet-safe silicone |
| Difficulty Level: | Moderate |
This DIY hamster cage is simple and sophisticated in appearance, and a lot of thought went into building it with the hamster’s safety in mind. The creator recommends looking out for pet-safe silicone to prevent the hamster from being affected by harmful chemicals.
The finished product contains plenty of room for toys, hiding spots, and food bowls, and is bigger than many commercially available hamster cages. The creator spent $112 on making this enclosure, but if you have some of the materials already on hand, it’ll be cheaper.
7. 3-Story Gerbil/Hamster Cage by Consumer Queen
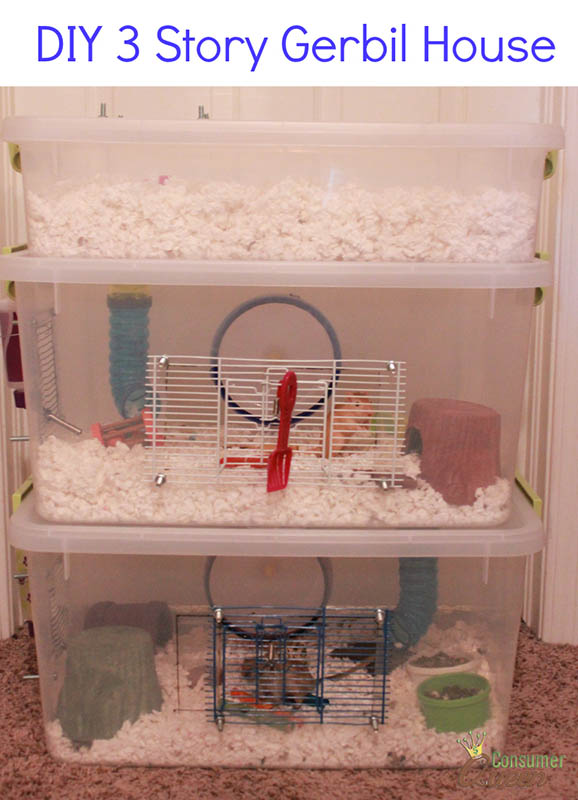
| Materials: | Storage bins, zip ties/screws/washers, wire mesh, cage accessories |
| Tools: | Pen, ruler, drill, box knife/exacto knife, candle |
| Difficulty Level: | Easy |
If one level just isn’t enough for your inquisitive furry friend, why not DIY a multi-story enclosure like this one by Consumer Queen? The creator cut holes in the bases of storage bins to connect them via tunnels. They also cut rectangles in the side of storage bins, installed mesh, and attached water bottles to them. One area of mesh even has a tiny spot-cleaning scoop attached to it, which we think is a nice touch. This cage is simple, well-thought-out, and looks safe and cozy for fuzzy inhabitants.
8. Build Your Own Cage for Hamsters by Rachel.Drozdz (Instructables)

| Materials: | Screws, nails, staples, linoleum, fibreboard planks, wooden sticks, reinforced pine and beech corners, steel wire mesh, cage accessories |
| Tools: | Hand drill, hammer, jigsaw, stapler, screwdriver |
| Difficulty Level: | Moderate to difficult |
This hamster cage is built from scratch with an assortment of materials, so it’s likely best suited to intermediate or advanced DIYers. You need to be confident using a jigsaw, as this project involves a lot of cutting to different sizes.
The layout of the enclosure is quite simple, with two shelves and plenty of room for toys, food, and exploring, and the end product looks pretty robust. It was designed to be bigger than pet store cages, which the creator feels are too small.
9. IKEA Linnmon Cage by Victoria Raechel

| Materials: | Linnmon table tops, Hemnes glass table top, furniture braces, screws, hardware cloth, spruce strips, wheels, mesh, staples, pet-safe silicone, handles, cage accessories |
| Tools: | Saw, screwdriver, drill, wire cutters, staple gun |
| Difficulty Level: | Moderate |
If you’re a fan of transforming simple IKEA furniture, this DIY IKEA Linnmon cage hack could be your next project. It appears to be moderate in terms of difficulty level, and may be a bit tricky for beginners, but should be fine for intermediate DIYers. Fortunately, there isn’t a gigantic or overly complicated materials list, and most of the items are easy to get hold of.
10. DIY Hamster Bin Cage by Hammy Happenings

| Materials: | Plastic bin, zip ties, marker, mesh/hardware cloth, duct tape, mask (for soldering), sandpaper, cage accessories |
| Tools: | Soldering iron (optional), serrated knife, wire cutters, ruler, candle, fan (for the fumes) |
| Difficulty Level: | Easy |
Another bin cage for our final pick, this time, a project by Hammy Happenings. This is another fine example of how simple, inexpensive items like a plastic bin with a snapping lid can make for the perfect cage structure. Once you’ve got your bin, a few adaptations, like cutting out areas for the mesh are all that’s needed. The creator used a soldering iron to make the cutting process easier, but this is completely optional.
Final Thoughts
In this guide, we’ve explored a real assortment of DIY cage plans, from those suitable for complete beginners, like plastic bin cages, to intricate furniture-turned-hamster cage projects. We hope you’ve found a cage plan you feel confident about and are excited to make.
Don’t forget that you can adapt your cage however you like; as long as it’s big enough, well-ventilated, and contains comfortable bedding, toys, food, and water bottles, your hamster won’t be too picky. Remember to perform daily spot cleans, too, to prevent your DIY hamster habitat from getting stinky, and clean it out thoroughly on a regular basis.
Featured Image Credit: AlexKalashnikov, Shutterstock