10 Tips & Tricks for Dyeing Your Cat’s Hair

Updated on

Dyeing your cat’s hair can be a fun way to change up their look, but it can also be a bit tricky. If you’re not careful, you could end up with a mess on your hands (and your cat’s fur). That said, it’s important to remember that cats have sensitive skin (not to mention delicate fur).
That’s why we’ve put together this list of 10 tips and tricks for dyeing your cat’s hair. We’ll help you figure out what products to use, how to apply the dye, and how to avoid any potential disasters. So get ready to have some fun with your kitty – and give them a new look that they’re sure to love!

Before You Begin
Before you start dyeing your cat’s fur, it’s important to do a patch test. This will help you determine if your cat is allergic to the dye, and it will also give you a chance to test out the color. To do a patch test, simply apply a small amount of the dye to a small area of your cat’s skin (we recommend their inner thigh). Then wait 24 hours to see if there is any reaction. If your cat shows any signs of irritation, discontinue use and consult your veterinarian.
A Word About Pet-Safe Dyes
Not all hair dyes are created equal. In fact, many of the dyes you’ll find at your local beauty supply store are actually quite toxic and can be very harmful to your cat. That’s why it’s important to use a pet-safe dye that is specifically designed for animals. Make sure to avoid dyes that contain ammonia, peroxide, or other harsh chemicals.
Supplies
Before you get started, there are a few things you’ll need to gather. First, you’ll need a pair of gloves to protect your hands from the dye. Next, you’ll need to choose a cat-safe dye. We recommend Manic Panic, as it’s non-toxic and gentle on your kitty’s skin. You’ll also need a small brush or comb to help apply the dye, and an old towel or T-shirt to protect your surfaces from any potential spills.

The 10 Tips & Tricks for Dyeing Your Cat’s Hair
1. Prep the Fur
Now that you have all of your supplies, it’s time to get started! The first step is to comb through your cat’s fur to make sure there are no knots or tangles. This will help the dye go on evenly and prevent any clumps from forming.

2. Mix Dye
Next, it’s time to mix up the dye according to the instructions on the package. Once it’s mixed, apply a small amount of dye to a test area on your cat’s fur (we recommend their belly). This will help you gauge how long you need to leave the dye in and whether they’re allergic to the product.
3. Apply Dye
When you’re ready to apply the dye, start by putting on your gloves. Then, using your brush or comb, work the dye into your cat’s fur, starting at the roots and working your way out. Be careful not to get any on their skin, as this can cause irritation.
4. Wait 15-30 Minutes
Once the dye is evenly distributed, wrap your kitty in an old towel or T-shirt to keep them warm and prevent them from licking the dye off of their fur. Leave the dye in for the recommended amount of time – typically 15-30 minutes – then rinse it out with warm water until the water runs clear.
5. Shampoo
After rinsing out the dye, you’ll need to shampoo your cat’s fur to remove any residual color. We recommend using a gentle, hypoallergenic shampoo to avoid irritation.
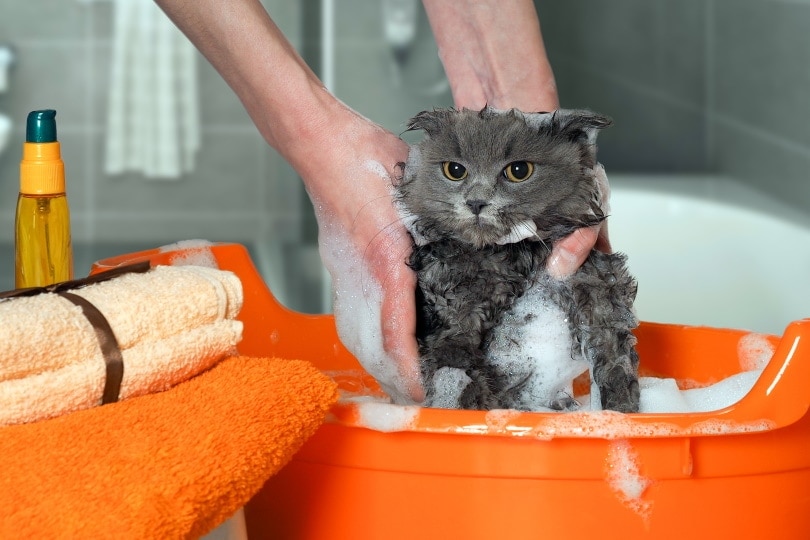
6. Rinse Again
Once the shampoo is out, give your kitty a good rinse with warm water. Then, towel dry their fur and comb through it to make sure there are no knots or tangles.
7. Style
Now that the dyeing process is complete, it’s time to style your cat’s new look! You can use the same brush or comb you used to apply the dye, or you can choose a new one specifically for styling. Professional dog dyers often compete in competitions where they style their dogs into other animal shapes or even works of art!
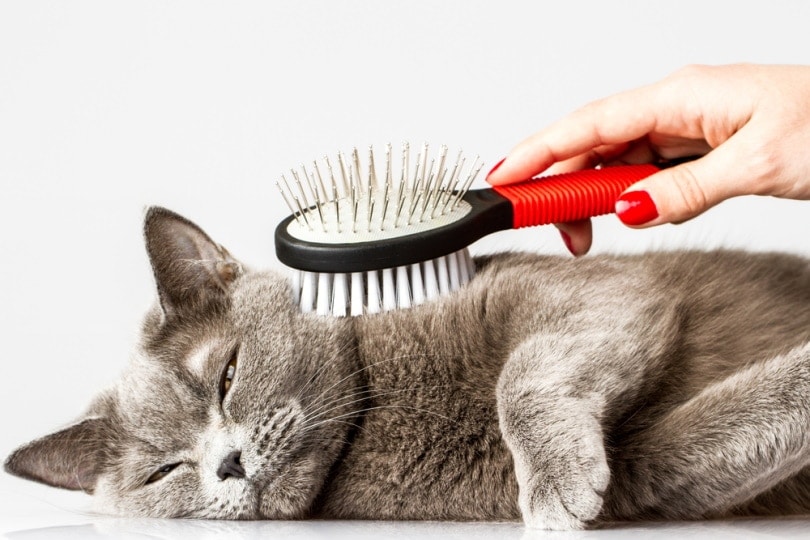
8. Brush Out
Finally, once you’re happy with your cat’s new style, it’s time to give them a good brush. This will help distribute the natural oils in their fur and keep their coat looking healthy and shiny.
9. Accessories
Attach any collars, scarves, or bows that you want your kitty to wear. Make sure they’re not too tight, as this could cause discomfort.
10. Fragrance
Apply any kitty-safe fragrances you like, as part of your regular grooming routine. This is optional, but it’s something that’s done at a lot of professional pet salons for that extra touch of kitty glam.
Few Final Tips & Tricks
- If you’re using a dark dye, you may want to put a white T-shirt or towel on your cat first to avoid staining their fur.
- To avoid any potential messes, we recommend doing the dyeing process in your bathtub or outside. If you’re worried about getting dye on your furniture or carpet, you can put a towel down first to catch any drips.
- If your cat starts to get fussy, take a break and try again later. It’s important to make sure they’re comfortable throughout the process.
- Once the dye is applied, avoid letting your cat lick their fur, as this can cause them to ingest the dye and potentially get sick.
- Keep in mind that the dye will likely fade over time, so you may need to touch up their color every few weeks or months.
- If you’re not sure what color to dye your cat, consider their personality and choose a shade that reflects that. For example, if they’re playful, you might want to go with a bright color like pink or blue. If they’re more laid-back, a calmer hue like green or purple might be a better choice.
- Have fun with it! Dyeing your cat’s fur is a great way to show off their personality and make them look extra cute.
- Never force your cat to sit through the dyeing process if they’re not enjoying it. It’s supposed to be fun for both of you, so if they’re not into it, that’s okay!
Conclusion
Dyeing your cat’s fur can be a fun way to change up their look, and it’s not as difficult as you might think! With a little patience and the right supplies, you can easily dye your kitty’s fur at home. Just be sure to follow the tips and tricks above to avoid any potential messes or mishaps.
- See also: 9 Best Cat Hair Clippers
Featured Image Credit: Reba Spike, Unsplash