How to Use Guillotine Dog Nail Clippers: Vet-Approved Step-by-Step Guide
By Adam Mann
Updated on
If your dog’s nails are getting too long, you can either pay to have someone trim them for you, or you can get the right tools and learn to do it yourself. If you’re choosing to trim their nails yourself, guillotine dog nail clippers are a great option you can use, but you need to know how they work before you start.
That’s why we came up with this comprehensive guide that breaks down everything you need to know to use guillotine dog nail clippers and trim back your pup’s nails to the right length! After all, you don’t want to accidentally trim too far and have your dog associate nail trimmings with pain. So, make sure you’re completely prepared before you get started.
Before You Start
Guillotine dog nail clippers can be the ideal tool to trim your pup’s nails, but only if you get the right ones. Ensure you get a high-quality set, and then test them for proper operation before you go to use them on your dog.
Ensure the blades are sharp, move back and forth freely, and are the right size for your hands and your pooch’s nails. It’s a little bit of prep work that will go a long way in ensuring you don’t accidentally hurt your pup when you start cutting.

The 5 Steps to Using a Guillotine Dog Nail Clipper
Once you have the right guillotine dog nail clippers and you verify that they’re in good working order, it’s time to start using them. With that in mind, we’ve highlighted five steps you should follow to safely and effectively use guillotine dog nail clippers.
1. Slowly Introduce the Clippers
Guillotine clippers can be quite scary looking to your dog, and the last thing you want is to have them freaking out simply because they don’t know what they are. Start by slowly introducing your dog to the clippers.
Keep the clippers close to them without using them, allowing your dog to sniff them and fully get used to them before you try to clip their nails. We recommend giving your pet at least a week to adjust to clippers by exposing them to your dog each day. Offering them a few treats while they sniff them is also a very smart idea. Once they seem more comfortable, start rubbing the clippers on their nails and handling their feet while offering treats for another week so that they know that the clippers won’t hurt them.
2. Start Clipping
Once your dog is comfortable around the guillotine dog nail clippers, you can start using them for their intended purpose. Since they should be comfortable with the clippers, they shouldn’t try to run away when you put the clippers near them.
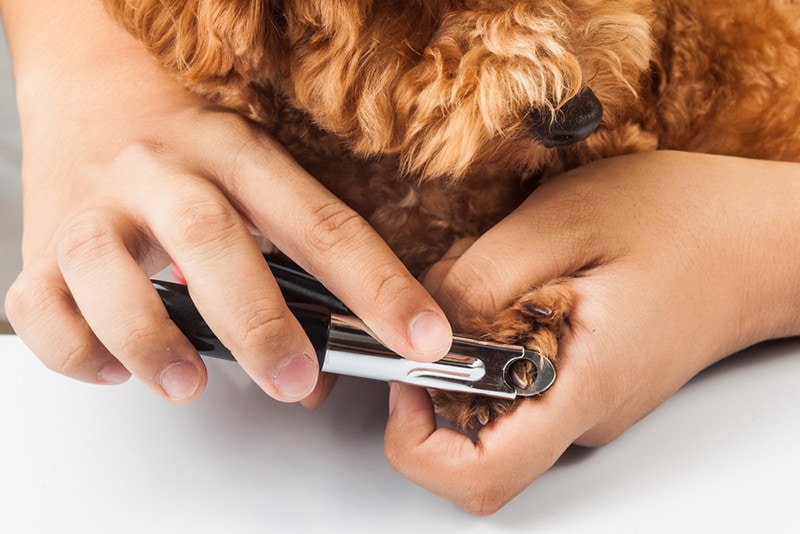
Get your dog in a comfortable position while they’re in a relaxed state. Slowly guide the ring of clippers over the nail and center it where you want to trim. Compress the handles to move the cutting blade and clip the nail. Trim off a short amount of nail at first. You want to ensure you don’t hit the quick, which is a soft cuticle that contains blood vessels and nerves. It will be a little painful for your dog—and bloody for you—if you hit this, so you must use extreme caution. If you don’t know where the quick is on your dog’s nail, ask your groomer or vet to show you. Continue this process until you’ve trimmed each nail.
If you accidentally clip a little too short and get some blood, use styptic powder or cornstarch to stop the bleeding.

3. Reward Your Pup
You want your dog to be excited and compliant when you’re trying to clip their nails, and rewarding them with praise and the occasional treat when they’re acting the way they should goes a long way. While you might not notice immediate benefits with this, it should make it easier to get them to cooperate next time.
4. File Down Edges
After you clip their nails, you need to remove any rough edges. Use a nail file to smooth out any rough or sharp areas so that they won’t catch on anything or scratch you when playing.

5. Reward Them Again
Once you finish filing, go ahead and reward your pup once again for a job well done! This will help ensure your dog wants to cooperate the next time you need to clip their nails, so don’t forget this important step at the end.
 Tips for Using Guillotine Dog Nail Clippers
If you’re using guillotine dog nail clippers, there are a few tips you should follow to ensure you get a clean cut, trimmed nails, and a happy pup every time!
Ensure the Clippers Are Sharp
Blades wear down over time, and guillotine dog nail clippers are no exception. Dull blades will tug and pull more on your pet’s nails, which leads to an unhappy dog. Meanwhile, sharp clippers make for a smoother experience, a cleaner cut, and most importantly, a more comfortable dog.

Consider a Guard
Nail guards aren’t foolproof, but they’re a great way to help ensure you don’t cut your dog’s nails too far back and accidentally hurt them. Get a high-quality guard and you can give yourself a little extra peace of mind and ensure your pup isn’t worried about you cutting their nails next time.
Cut a Little at a Time
When in doubt, cut back a little of their nail instead of taking off large chunks. This helps ensure you don’t take too much off and accidentally make them bleed. You can always take more off later, but if you take too much off and hurt your dog, they’ll be far less likely to cooperate next time. Again, if you’re unsure how much to take or where the quick is in your dog’s nails, have a groomer or veterinarian show you.
 Final Thoughts
Now that you know a little more about guillotine dog nail clippers, all that’s left is for you to start getting your dog comfortable with them. Give them plenty of time to warm up to the tools, including putting them on and near your dog’s feet so they don’t freak out about them when you’re ready to clip their nails for the first time!
See also:
- Can Parrots Eat Parsley? Vet-Reviewed Health Concerns
- Why Does My Dog Follow Me Everywhere? 5 Common Reasons
Featured Image Credit: ThamKC, Shutterstock


